Tools
This section illustrates uses and applications of tools options.
Add to Style Gallery
Through this item you can add a defined cell style to the style gallery. If the style is an existing one, just use it without a re-definition.
Select the cell for which the style will be configured, click Tools -> Add to Style Gallery, and open the “Input” dialog box, as the following shows:
One example:
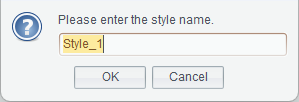
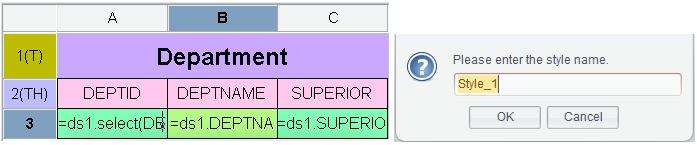
Select a cell and set up a series of properties, such as foreground color, background color, font and bold. Click Tools -> Add to Style Gallery and edit the style name in the following pop-up dialog box:
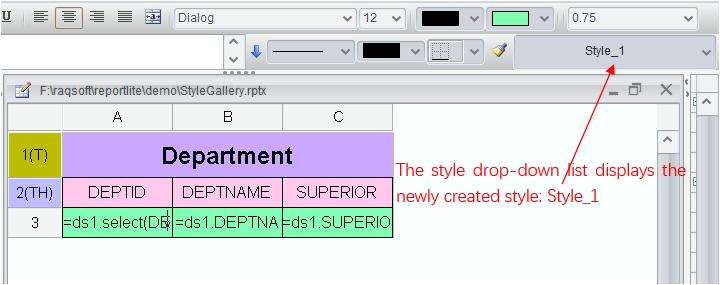
Click “OK” button and the defined style will be displayed in the style drop-down list on the toolbar, as the following screenshot shows:
If the other cells also use the same style, you can just use it without re-defining one for them. Click a selected cell and choose an existing style name in the style gallery. You can also find the desired style in the Preset Cells & Style panel and drag it up to the target cell. The style information is saved in “Report Layout Config File” on Tools -> Options -> File tab.
Add to Predefined Cell
Add a defined cell to the predefined cell list through this item. A predefined cell includes not only the source cell’s style information, but its content information (including the cell expression).
Select a cell to be added to the predefined cell list, and click Tools -> Add to Predefined Cell to get into the following “Input” dialog box:
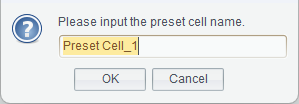
Type in the predefined cell name and click “OK” to add the selected cell to predefined cell. If a cell has the same definition as a predefined cell, just find the predefined cell in the Preset Cells & Style panel and drag it up to the target cell without re-defining it.
Color Scheme
Edit the color scheme for a graph through this item.
Click Tools -> Color Scheme to pop up the following “Edit Graph Color Scheme” interface:
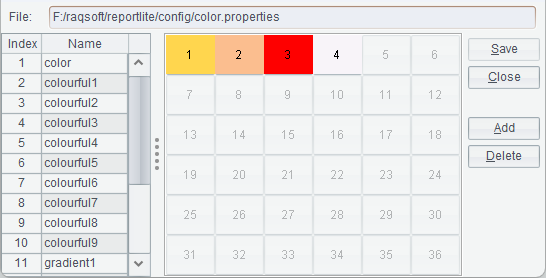
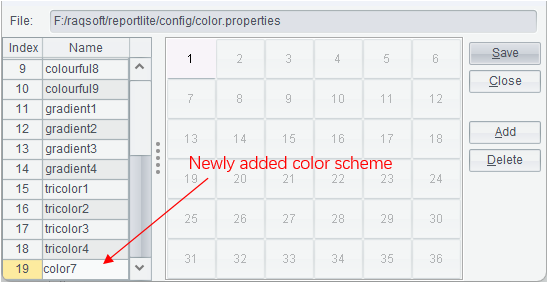
Click “Add” button to add a new color scheme. Then name the scheme under the “Name” box in the left, and edit it through the color squares in the right, as the following screenshot shows:
Select a color scheme in the left color scheme list, and click the color squares in the right to change colors in the scheme. Select scheme colorful2, for instance, and click No.1 color square to pop up the following “Select color” dialog box:
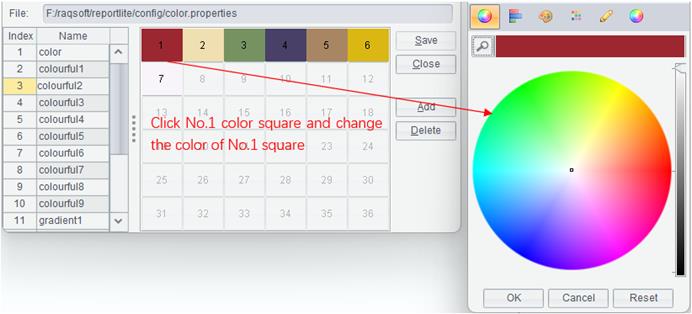
Select a color scheme in the left color scheme list and click “Delete” button to delete the scheme. After finishing the color editing, click “Save” button to save the change in the color scheme file.
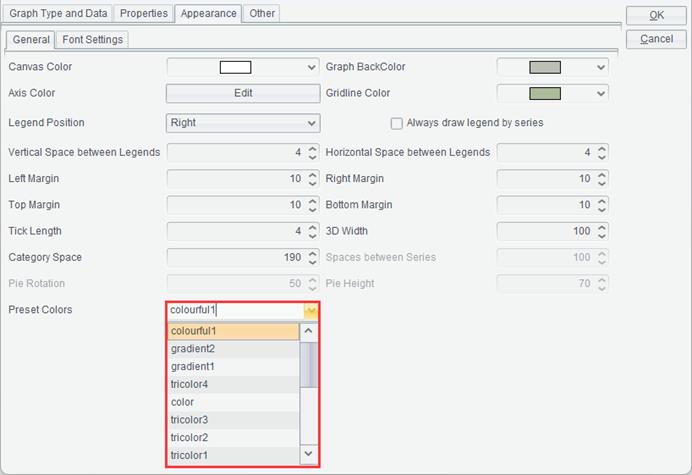
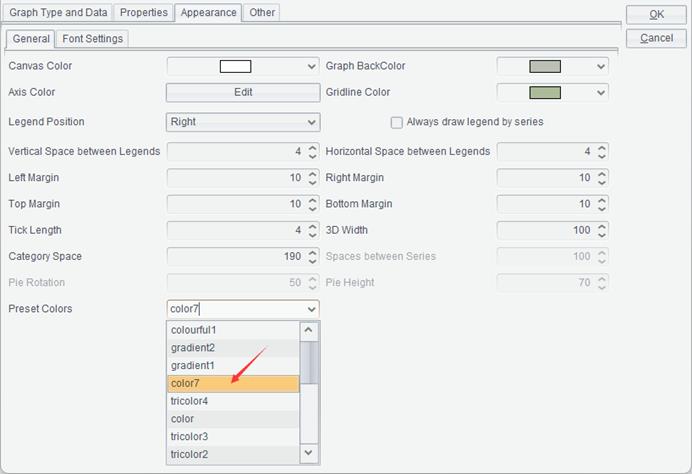
You can use an edited color scheme to plot a graph. Click Report -> Graph on the menu bar to get into the “Graph Properties” interface, and switch to “Appearance” tab, where you select a color scheme in “Preset Colors” drop-down list, as the following screenshot shows:
Here is the system-default color scheme:
And we add a new color scheme:
The color scheme is saved in the color scheme file color.properties (default path is【default reportlite designer installation path】\ reportlite\config\color.properties).
As the following shows:
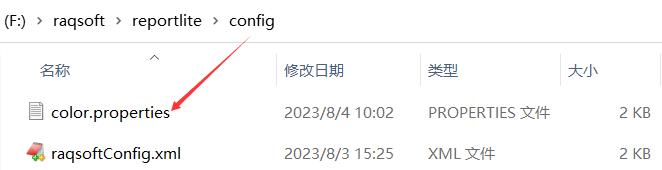
The color.properties file is by default saved in the config directory. You can view effects of various color schemes when previewing a report on the designer.
Script Editor
Through this item, you can open an esProc script, copy/paste/execute/edit it, and save it as an SPL file.
Click Tools -> Script , and the system pops up the following “Edit Script” window:
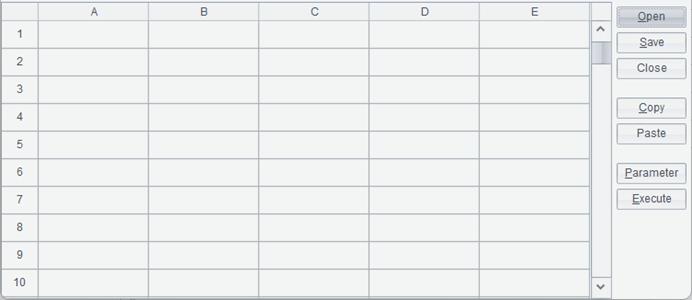
Click “Open” to open an SPL file and edit the script. Then click “Save” to save the edited script as an SPL file.
Click “Copy” to copy the script in the script editing area to the clipboard for paste.
Click “Paste” to paste the script in the clipboard to the script editing area.
Click “Close” to close the “Script Editor” window.
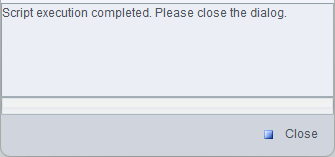
Click “Execute” to execute the script. After the execution, the following script execution window will pop up.
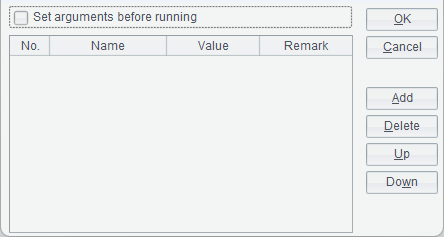
If the script contains parameters, click “Parameter” button to edit them.
Import Excel
This item lets you convert an Excel file into an .rptx report file and save it in the specified directory.
Import Excel file
Click Tools -> Import Excel to open the following “Import Excel File” interface:
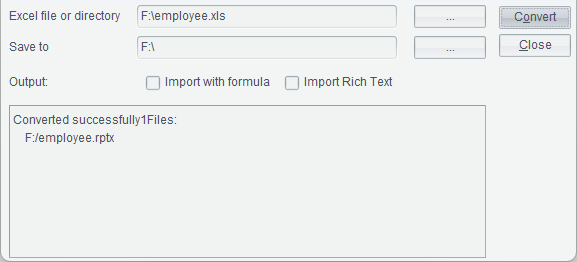
Enter the to-be-imported Excel path, or click 【…】button on the right to select an Excel source file.
Enter the path in which the converted report file will be saved, or click 【…】button on the right to select one.
Select “Import with formula” and “Import Rich Text” as needed.
Click “Convert” button to execute the conversion. The conversion result will be displayed in “Output” box. After the conversion is successfully done, close the interface.
Now click “Open” button again to view the new report file.
Import Excel Directory
Click Tools -> Import Excel to open the following “Import Excel File” interface:
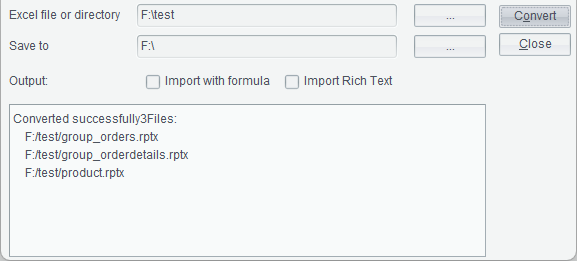
Enter the to-be-imported Excel directory path, or click 【…】button on the right to select an Excel directory.
Enter the path in which the converted report file directory will be saved, or click 【…】button on the right to select one.
Select “Import with formula” and “Import Rich Text” as needed.
Click “Convert” button to execute the conversion. The conversion result will be displayed in “Output” box. After the conversion is successfully done, close the interface.
Now click “Open” button again to view the new report files.
Note: Select “Save to (Directory) ” to save the target Excel directory and the result .rptx files in the specified directory.
Migrate Report
This item is used to migrate and convert a RaqReport file (.rpx) to a ReportLite file (.rptx).
Migrate File
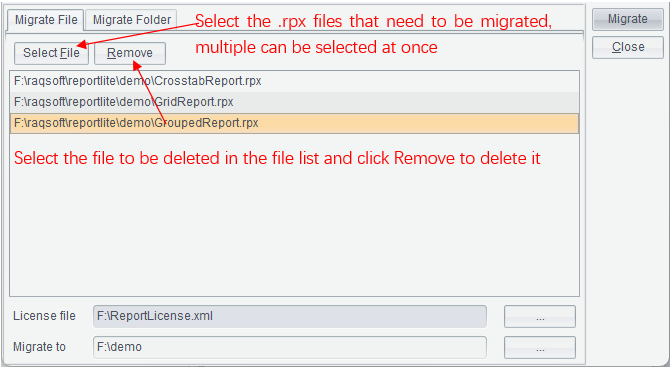
License file: Specify the license file needed for migrating a RaqReport file (.rpx).
Migrate to: Specify the directory to which the file is migrated.
Migrate Folder
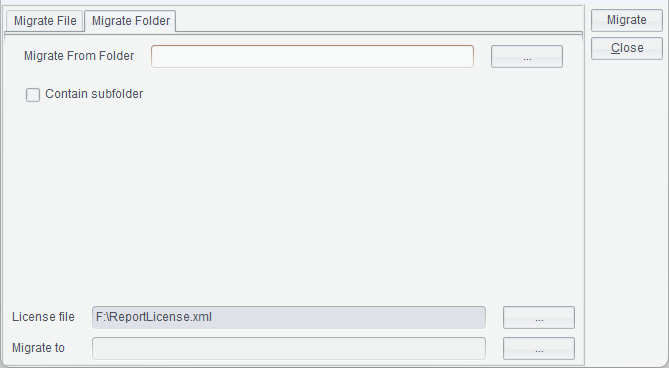
You can directly select a directory to migrate .rpx files and .rpx file(s) in the subfolder (optional) in it.
Datasource
Through this item you can define the JDBC/ODBC connection parameters and control data source connection/disconnection.
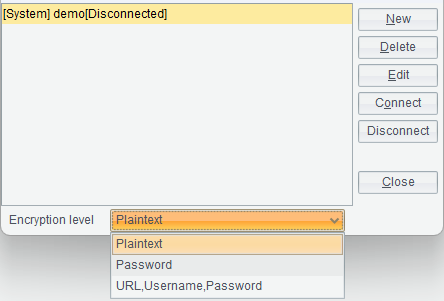
Click Tools -> Datasource, and the system will pop up the following “Datasource” window:
Click “New” button to create a new data source;
Click “Delete” button to delete a selected data source from the left list box.
Click “Edit” button to change the definition of a selected data source in the left list box.
Click “Connect” button to connect to a selected data source in the left list box.
Click “Disconnect” button to disconnect from a selected data source.
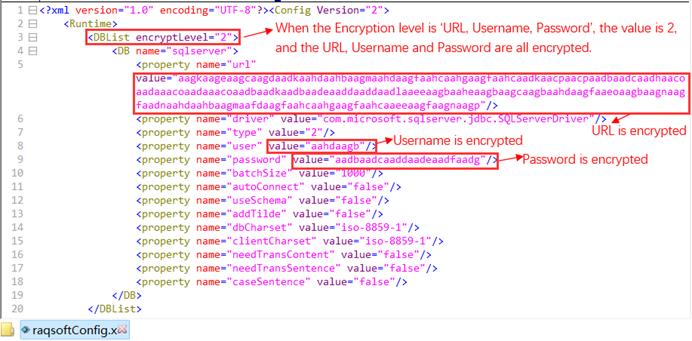
Encryption level: Encrypt URL, username or password in the data source definition. The value corresponds to encryptLevel property configured in raqsoftConfig.xml file. The encryptLevel property value is 0 (plaintext), 1 (password encryption) or 2 (URL, username and password encryption).
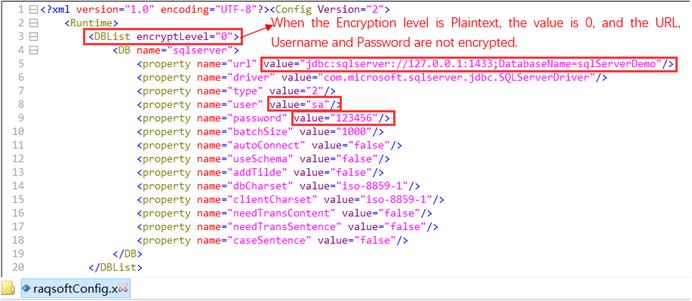
Plaintext — Do not encrypt URL, username and password in the data source definition. In this case, encryptLevel = 0.
With plaintext encryption level, encryptLevel = 0 will be automatically set up in the data source configuration in raqsoftConfig.xml file. In this case, URL, username and password won’t be encrypted, as the following screenshot shows:
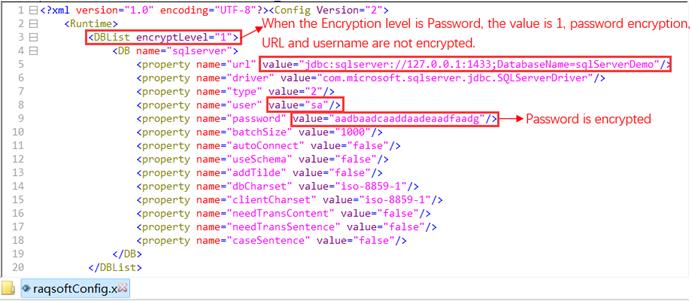
Password — Encrypt the password in the data source definition. In this case, encryptLevel = 1.
With password encryption level, encryptLevel = 1 will be automatically set up in the data source configuration in raqsoftConfig.xml file. In this case, the password will be displayed as an encrypted text string, as the following screenshot shows:
URL, Username, Password — Encrypt URL, username and password in the data source definition. In this case, encryptLevel = 2.
With URL, username and password encryption level, encryptLevel = 2 will be automatically set up in the data source configuration in raqsoftConfig.xml file. In this case, the URL, username and password will be displayed as encrypted text strings, as the following screenshot shows:
Now look at how to create a new data source:
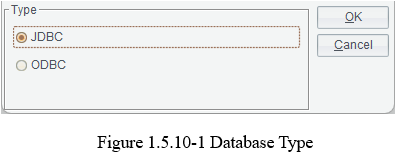
Click “New” button to get into the following “Select a Type” dialog box. There are two types of databases – JDBC and ODBC, as the following figure 1.5.10-1 shows:
JDBC
In the above “Type” dialog box, select “JDBC” and click “OK” to get the following RDB JDBC settings dialog box:
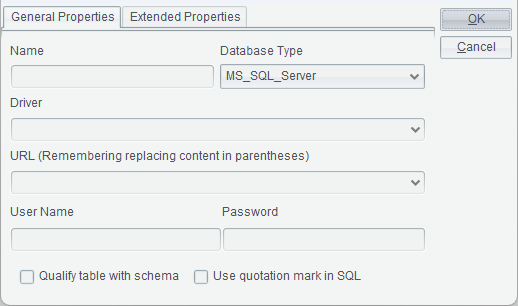
1. Name: Any name you want, such as ora and SQL17.
2. Database Type: Select a desired database; select “Other” if there isn’t the one you want.
3. Driver: You can use the default driver oracle.jdbc.driver.OracleDriver, or type in information of another driver.
If you do not use the built-in driver in the installation package, the JDBC driver jars for connecting to a database need to be copied under the JDBC application of designer installation directory, such as C:\Program Files\ raqsoft\reportlite\common.
4. URL: The default URL is jdbc:oracle:thin:@192.168.0.1:1521:[DB name]. [DB name] is the name of database actually used, such as jdbc:oracle:thin:@192.168.0.68:1521:demo.
5. User Name: Database user name.
6. Password: The password for accessing the to-be-connected database.
7. Qualify table with schema: You can decide whether to add schema before a data table name, such as dbo.employee by checking or unchecking this option.
8. Use quotation mark in SQL: By checking or unchecking this option, you can decide whether to quote a SQL statement.
Extended Properties: Besides the above general properties, you can configure more parameters for a database on this tab. Different databases have different parameters in the extended properties, which are automatically added according to database types after general properties are configured. Some databases, such as Access, don’t require extended parameters.
After all these configurations, click “OK” to return back to “Datasource” window, where the newly-created data source is listed, and a RDB datasource finishes configuration.
ODBC
In the “Select a Type” dialog box, select “ODBC” and click “OK” to get the following ODBC datasource settings dialog box:
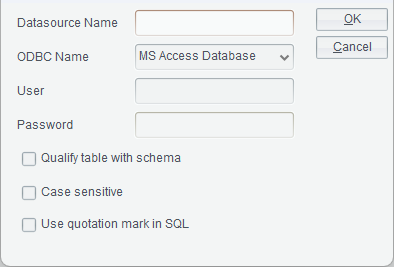
1. Datasource Name: Any name you want, such as ora and SQL17.
2. ODBC Name: The ODBC data source name configured in ODBC datasource manager.
3. User: Database user name.
4. Password: The password for accessing the to-be-connected database.
5. Qualify table with schema: You can decide whether to add schema before a data table name, such as dbo.employee by checking or unchecking this option.
6. Case sensitive: You can specify whether a SQL statement has same meaning when using lowercase and uppercase characters.
7. Use quotation mark in SQL: By checking or unchecking this option, you can decide whether to quote a SQL statement.
After all these configurations, click “OK” to return back to “Datasource” window, where the newly-created data source is listed.
Note:
An ODBC data source does not support jre1.8 and higher versions.
Options
This item lets you configure default properties, Esproc options and system parameters for a new report.
Click Tools -> Options to get into the following options configuration window:
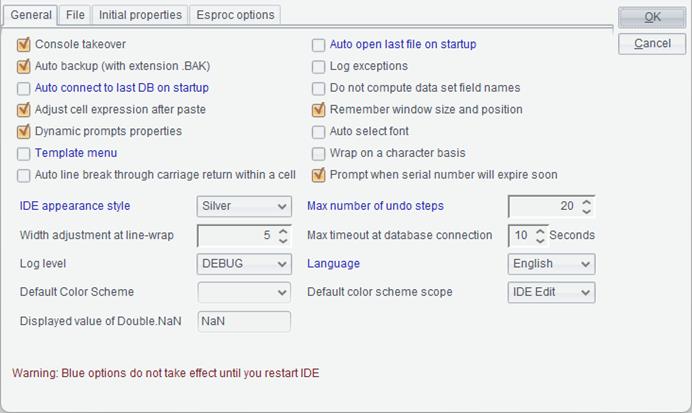
● Blue options do not take effect until you restart IDE.
Switch to General, File, Initial properties or Esproc options tabs to set up related properties.
In the “Options” window, switch to “General” tab, as the above screenshot shows:
Console takeover
Decide whether to write report execution log to the console or not through this option. When it isn’t checked, the “Console” panel won’t appear on the left of the designer. When it is checked, we can view the system log on the “Console” panel.
The “Console” panel lets you check the report log information the system records, including the error information, for the convenience of debugging.
Click “Console” to switch to the Console panel, as the following screenshot shows:
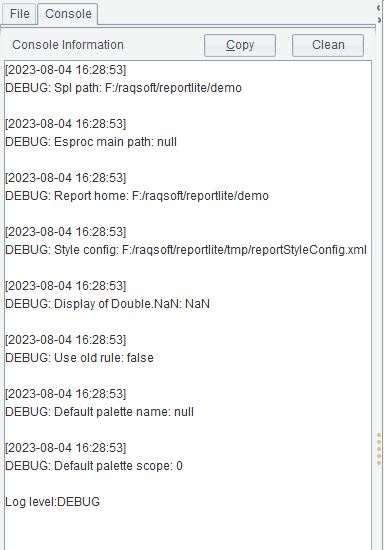
Click “Copy” to copy the information displayed on the console to another place. Click “Clean” to clear information on the console.
Auto open last file on startup
Choose whether to automatically open the last-opened file before the designer is last closed. If the property is checked, the most-recently-opened report file will be automatically opened the next time when you start the designer. If the file does not exist, error will be reported at the designer startup. If the property isn’t checked, no report files will be automatically opened the next time you launch the designer.
Auto backup (with extension .BAK)
Choose whether to auto-backup the old report when saving the modified version. If the property is checked, the system will automatically backup the report before modification when the modified version is saved. When you need to get back to the old version when, for example, error occurs during the modification, you can recover it using the backup file. If the property isn’t checked, the system won’t backup the old report version when saving the modified version.
Log exceptions
Choose whether to print exceptions directly on the backstage window or write them to a log file when exceptions are thrown during report computation. By checking the property, write exceptions to a log file; and without checking it, exceptions won’t be written to a log file. Set up the log file information in Tools -> Options -> File tab.
Auto connect to last DB on startup
Choose whether to automatically connect to the last-connected DB at designer startup. If the property is checked, the most-recently-connected data source will be automatically connected the next time when you start the designer. If the property isn’t checked, no data source will be automatically connected the next time you launch the designer.
Do not compute data set field names
Without checking this option, the application will compute and get data set field names for editing expressions when opening a report or editing report data set on the designer. For some data sets, computing field names is time-consuming. With such reports, you can select this option to skip computing field names when opening the report or finish editing the report data set.
Adjust cell expression at paste
Choose whether to dynamically adjust expression in the cell when copying and pasting it to another cell.
For instance, B1 contains expression =A1+A2, and you copy and paste the expression to B4. By checking this property, the expression in B4 will be automatically adjusted as =A4+A5 at the paste. Without checking the property, B4 receives the original expression =A1+A2.
Remember window size and position
Choose whether to remember the position and size of a window. By checking this option, the system remembers the position and size of a window if they are changed and displays the window at the previous position and in the previous size the next time you open it. Without checking the option, the system displays the window at the default window and in the default size. The option applies to all dialog window whose size is adjustable, such as data set window, parameter editing window and expression editing window.
Dynamic prompts properties
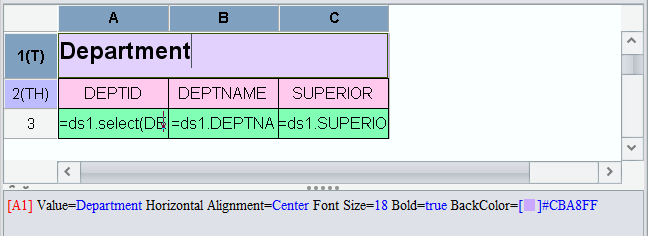
Choose whether to automatically display property information of a cell on the bottom of the designer when hovering cursor on the cell. By checking this option, properties will be automatically displayed when you put cursor above a certain cell; without checking it, the cell’s properties won’t be shown. In the following screenshot, when cursor is put on A1, the cell’s configured properties appear on the bottom of the designer:
Auto select font
When text typed in cannot be displayed in certain fonts, those fonts will be filtered away and won’t be appear in the font drop-down list.
Template menu
Choose whether to display the option in the File menu. Only when it is checked here the option will appear under File.
Wrap on a character basis
Choose whether to break a word at any character for line break.

Auto line break through carriage return within a cell
Set whether to automatically change to auto line wrap cell property when entering multiline content.
Prompt when serial number will expire soon
Choose whether to display a prompt when serial number expires soon through this option.
IDE appearance style
This option lets you set appearance style of the ReportLite application. There are two choices: Silver and Blue.
Max number of undo steps
Set the maximum number of editing steps the system can record and cancel by pressing CTRL+Z or clicking Edit -> Undo.
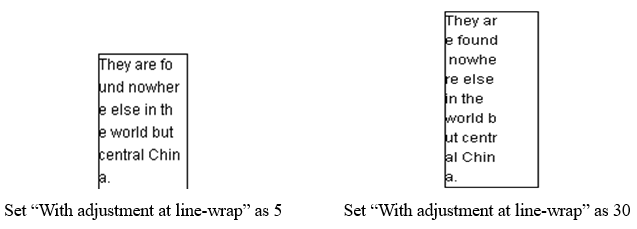
With adjustment at line-wrap
Set the fine-tuned text width at line wrap, that is, the distance between each line and the right border; the unit is px.
Max timeout at database connection
Set the maximum wait time at database connection. The connection is considered failed if it takes longer than the configured maximum wait time to connect a DB.
Log Level
It specifies the logging level displayed in the console.
The logging levels include OFF, SEVERE, WARNING, INFO and DEBUG, whose priorities descend in the listed order. With OFF level, no information will be exported; with INFO level, only information at levels of SEVERE, WARNING, INFO will be exported; and so on with the rest levels.
Language
There are two options for the languages used in ReportLite application: [Simple Chinese] and [English].
Default Color Scheme
The option sets colors during the editing process for such as foreground, background and border through the toolbar.
When the default color scheme applies to the whole report, you can set up color scheme for statistical graphs.
Default color scheme scope
Set the application scope for the default color scheme. There are two choices – “IDE Edit” and “All”.
When the default color scheme scope is IDE Edit, it applies only to the color editing on IDE, such as editing foreground color, background color and border color through the toolbar.
When the scope is All, the default color scheme is both valid for IDE editing and the graph making. When no color schemes are set for a graph and the default color scheme is set in the option, the default color scheme will used for the graph.
Displayed value of Double.NaN
Set the default displayed value for Double.NaN.
Switch to “File” tab in the “Options” interface, as the following screenshot shows:
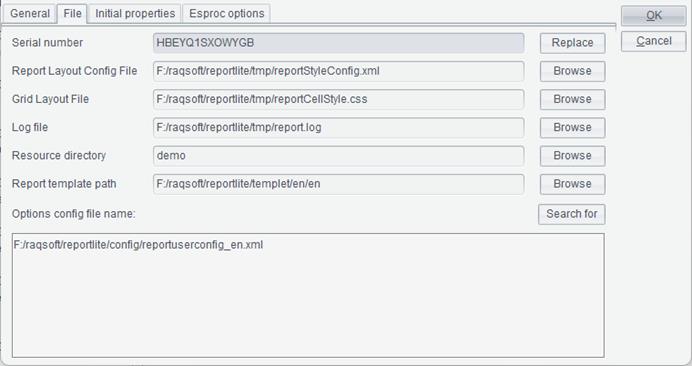
Serial number
Set a serial number for a ReportLite product.
Report Layout Config File
Set the location of report style file, where you can set up multiple report styles. You can set different styles for different reports through “Report properties” menu. Details are explained in “Cell Style” in Others.
The report layout config file URL supports both absolute path and relative path. The latter is relative to【installation root directory】/reportlite, such as tmp/reportStyleConfig.xml. The configuration corresponds to the path in styleConfig property in raqsoftConfig.xml’s <Report/>.
Grid Layout File
Set location of the file containing cell style information.
Log file
Set location of the file containing designer logging information. It supports absolute path only; do not output logging information when this property is left empty.
Resource directory
The directory path can be an absolute path or a relative path; a relative path is relative to【installation root directory】/reportlite. The configuration corresponds to the path in home property under <Report> in configuration file raqsofConfig.xml. Do not precede a relative path with the slash “/”. For example, the actual path should be【installation root directory】/reportlite/demo when the resource directory is set up as demo.
When path of the subreport, file in the file dataset or the report group source is a relative one, it is relative to the resource directory. For example, if the relative path of the report group source is set up as reportFiles/orders.rptx, the actual path is【installation root directory】/reportlite/demo/reportFiles/orders.rptx and in this case the resource directory is configured as demo.
Report template path
Set path of the report template sample file stored in the local machine. You can view the template file through File -> Template.
Options config file name
Set name of configuration file containing options and properties in Tools -> Options. Click “Search for” button to locate the target configuration file.
Switch to “Initial properties” tab in options configuration window, where you can define default values for a newly-created report’s report properties, row/column properties and cell properties, as the following screenshot shows:
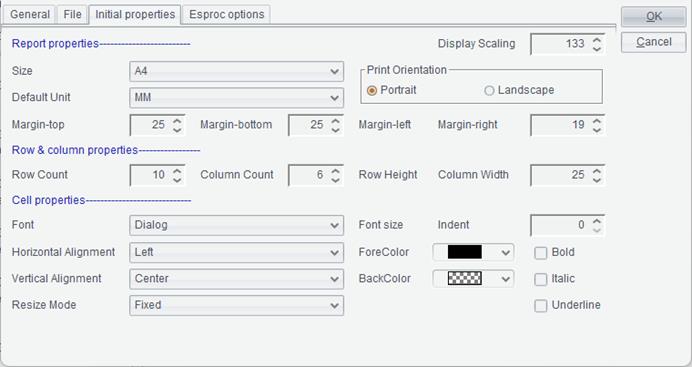
The property information configured under “Reset Cell” will be still valid and displayed after the cells are restored to their initial statuses.
Switch to “Esproc options” tab in options configuration interface, where you can define esProc configurations, as the following screenshot shows:
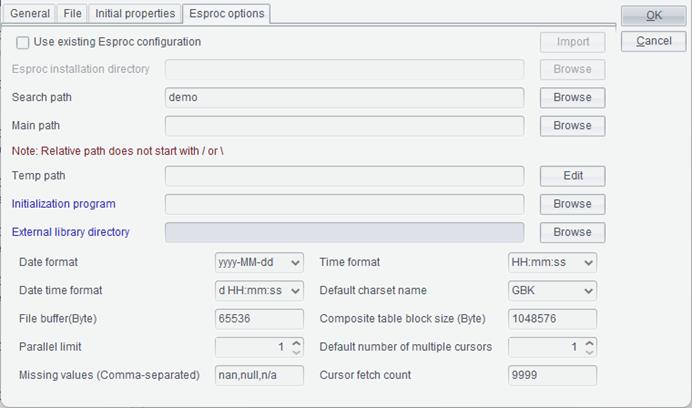
Use existing Esproc configuration

Check “Use existing Esproc configuration” checkbox to specify the existing esProc directory and read esProc options configurations.
Search path
Specify relative paths of files referenced in a cellset program; can specify multiple paths separated by semicolon.
Main path
The root directory that holds the relative path files and remote files. Use the directory containing the current application file if no main path is set up for esProc.
Temp path
The directory holding temporary files, which is relative to the main path.
Initialization program
Specify a SPL file to initialize the designer at startup.
External library directory
The main directory where the external library files are located and where Raqsoft external library core jars and the necessary third-party jars are held in the subdirectories. HERE are details.
Date format/Time format/Date time format
Set format for date/time data, and date/time data in cell values will be displayed in the configured format.
Default charset name
Set the default character name esProc uses. By default, the character set parameter in related functions is the character set configured here.
File buffer (Byte)
Set the buffer size for file read/write.
Composite table block size (Byte)
Set size of a composite table block. A composite table stores data by block, and blocks are the basic unit for space allocation during composite table maintenance. The block size is usually the default value.
Missing-values (comma-separated)
Set missing values, which are comma separated. When importing data from a text file, some field values contain symbols that are understood as null. We can use missing values to defines those symbols.
Parallel limit
Set the maximum number of parallel tasks for parallel processing in esProc. When the parameter specifying the number of parallel tasks in the multithreading function is absent, use the value specified here as the default.
Default Number of multiple cursors
Set the default number of multiple cursors. When the parameter specifying the number of subcursors in a multicursor-related function is absent, use the value defined here as the default.
Cursor fetch count
Set the number of records fetched from a cursor each time. The value is used in computing a cursor-related function.