Window
In this section, let’s look at operations and uses of items and options under Window in the menu bar.
Show/Hide Left Panel
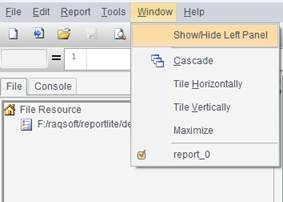
Expand or collapse the left panel using this item. By expanding the left panel, you can view sample ReportLite under “File Resource”.
By default, the left panel on the designer is hidden after ReportLite is installed. You need to drag it wider to make it display. Click “Show/Hide Left Panel” and the left panel will be expanded or collapsed, as the following screenshot shows:
Cascade
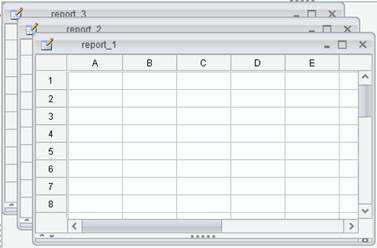
This item is used to display currently opened windows one on the other with a slight displacement in the designer.
Click Window -> Cascade to achieve the cascade mode, as the following screenshot shows:
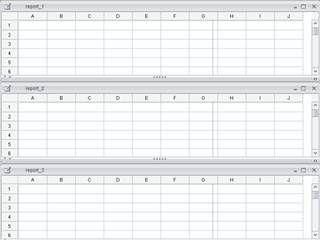
Tile Horizontally
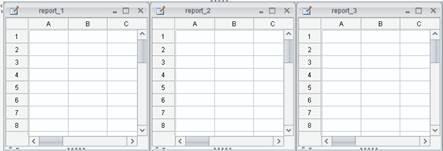
Click this item and the currently-opened windows will be tiled in the designer horizontally.
Click Window -> Tile Horizontally to tile windows horizontally, as the following screenshot shows:
Tile Vertically
Click this item and the currently-opened windows will be tiled in the designer vertically.
Click Window -> Tile Vertically to tile windows vertically, as the following screenshot shows:
Maximize
Click this item and the selected window will be displayed in the designer in the maximum size.
Click Window
-> Maximize and select a window, or click the ![]() button at the top
right corner in the designer to display the selected window in the maximum
size. This is the default way a window is displayed.
button at the top
right corner in the designer to display the selected window in the maximum
size. This is the default way a window is displayed.
Display Windows List
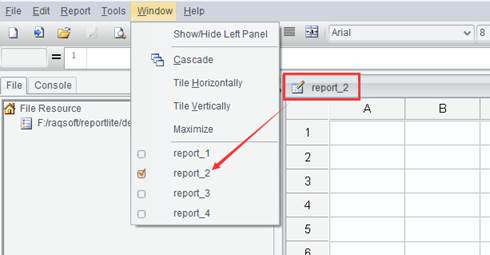
This item lets you display the list of the report files opened in the ReportLite designer. In the list, the active window is marked by the tick.
In the following screenshot, report_2 is checked because it is currently active:
